Scala is a PandaCommerce theme made to handle a large number of products, optimized for a mobile shopping experience.
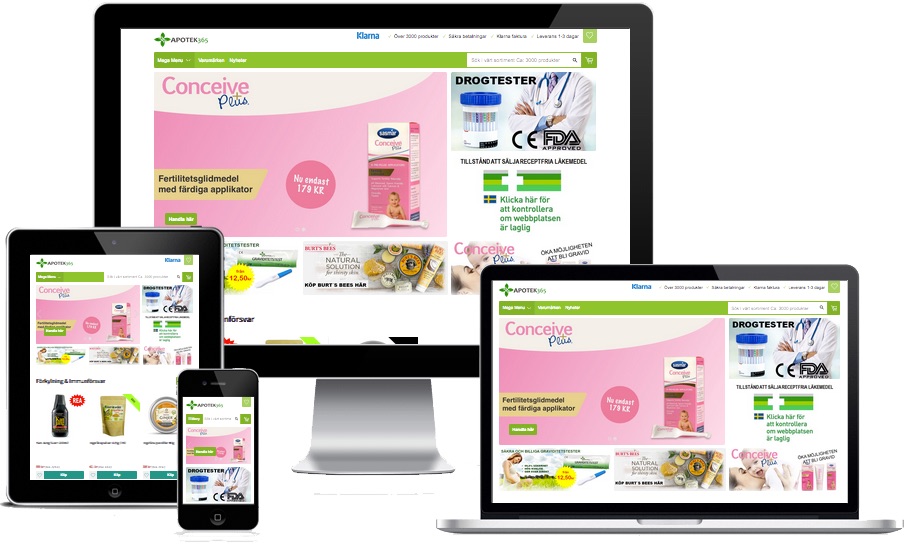
If you want to see live examples, check out our demo shops.
| The demo shops are currently in Swedish but different language and currency setups are fully supported. |
Theme features
The theme was developed with Mobile-First / Responsive design principles and practises. It is targetted for shops containing several thousand products.
Apart from bare bones e-commerce functionality, Scala offers many additional features in order to enhance the shopping experience and increase the customer conversions rate.
-
Mega menu with icons and categories
-
Unique selling points in header
-
Trust images in header and footer
-
Campaign and Featured product banners
-
Blog posts with products
-
Best selling products in collections
-
Advanced product filtering
-
Product vendor linkings
-
Product addons
-
Dropdown ajax cart
-
Cart savings and free shipping levels
-
Product whishlist
-
Product attribute icons
-
Product card info/image overlay
-
Nosto integration for favourite picks
-
Search Engine adaptations and optimizations
Getting started
You can purchase and install the theme from your PandaCommerce account by clicking on the Themes menu and the Find more themes button.
Locate Scala in the theme store, select the preset you want to start with and click on Purchase Theme.
The theme preset you select does not really matter as it’s only a default set of colors and settings that are applied. You will need to go through most of the settings to create your own unique look.
| When you install a theme there is no demo content as that would risk overwriting your current setup. So it is perfectly normal for a newly installed theme to look empty. |
Theme settings overview
Click on the Theme settings link to access the theme files and settings.
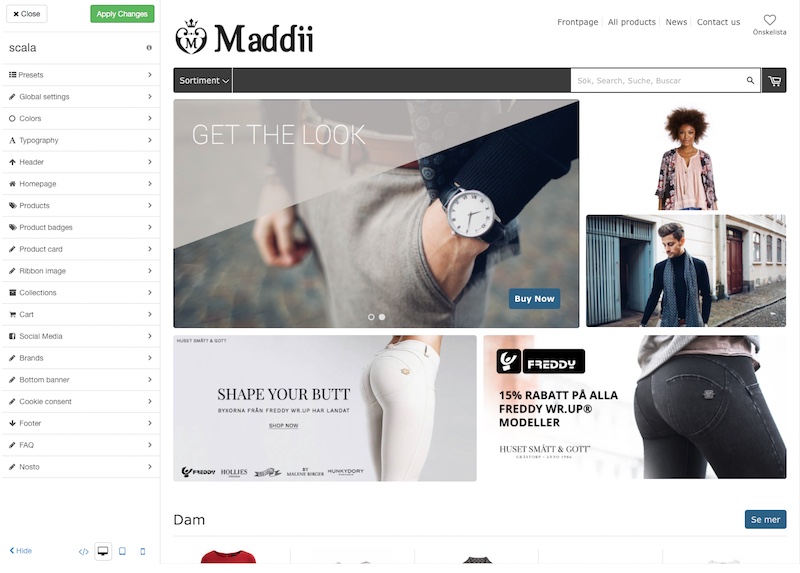
| The top right (i) symbol opens up an information page where you can locate this manual. |
| Setting | Description |
|---|---|
Presets |
Contains our two presets for this theme |
Global settings |
Configure |
Colors |
General, Header, Body and Footer color settings |
Typography |
Base and Header font styles |
Header |
Logotype, Trust section, Quick links, Headers message, Top icons, Main, Header and Mega menu settings |
Homepage |
Contains settings for the visible elements on the frontpage (index page). Slideshow, Campaign images, Featured links, Collection rows, Blog, Vendors list, Content (page) settings. |
Products |
Settings for the products view such as image zoom, quantity selector, sticky sidebar, related products toggles, Barcode title, delivery time tag settings and a default product image (missing image) setting. |
Product badges |
Settings for product badges shown on the product pages. Used for uploading glyph (small images) and configuring tags such as |
Product card |
Settings that affect the product card in collections. Show additional info on hover or show next image on hover. |
Ribbon image |
Settings for product ribbon tags and images such as |
Collections |
Enable bestselling products, collection filter settings, number of products before pagination. |
Cart |
Dropdown cart settings, show savings, personal message and free shipping level setting. |
Social media |
Settings for social media sharing on Facebook, Twitter, Pinterest and Google+, and Blog Atom/RSS feed setting. |
Brands |
Settings for shop brands with logo, name, description and link to the vendor site. |
Bottom banner |
Bottom page banner for mobile and desktop devices. |
Cookie consent |
Settings for enabling cookie consent, settings color, text and position. |
Footer |
Footer and social media links, Newletter form, Checklist, Support area and Trust image, and Klarna tooltip settings. |
FAQ |
Color settings for the FAQ page. |
Nosto |
Nosto integration settings |
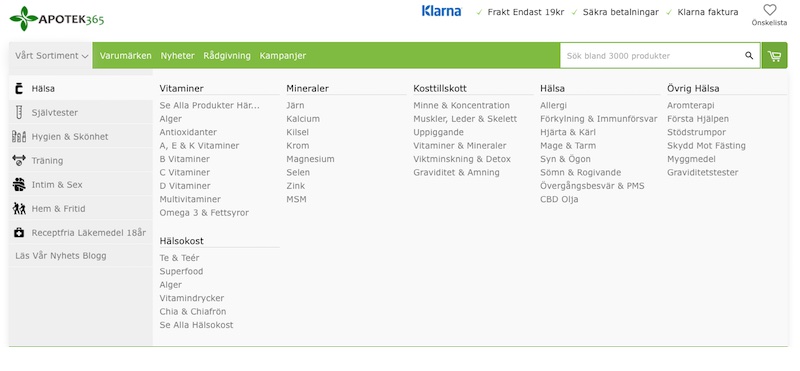
Mega menu
The Mega menu is the main navigation for locating products in the shop. It is able to show several hundred links grouped under sections and categories.
You need to prepare three things before a working Mega menu is in place.
-
Have products in your shop
-
Setup collections (categories) with products
-
Create Navigation link lists
The above bullets are basic store setup that is required regardless of theme.
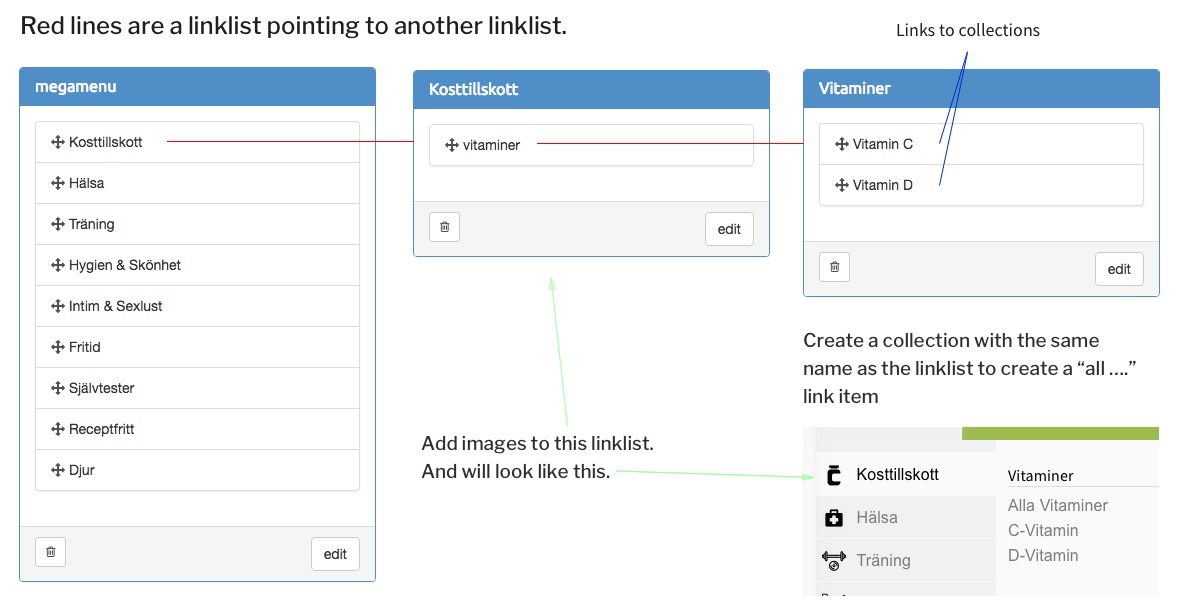
The link list in the Navigation needs to be two levels deep for the mega menu to work properly.
NavigationParent link list→Child link list→Sibling link list
Where the Parent contains links to Childs with Titles and Icons shown on the leftmost side. The Sibling link lists contains links to your collections (or individual products) that you want to link to.
Set the name of the sibling to the collection (category) name and you get an link item at the bottom with a See all … link.
|
How to conect the Mega menu to the navigation
-
Open the Theme Settings→Header topic
-
Scroll down to the Mega Menu section
-
Select a linklist (parent) that you want to use
-
Assign a title for the dropdown button.
How to setup navigation items and categories
Tag system
Scala makes use of special tags for activating additional features.
-
'%'-prefix is used for delivery terms
-
'+'-prefix is used for product addons
-
'#'-prefix is used for product badges
Delivery terms
Delivery terms is information that is shown on the product card and product view that reflects your terms of delivery on the product i.e delivery time.
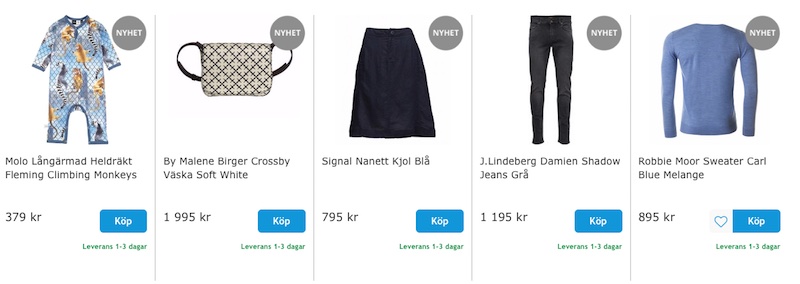
On the example above you see the terms in green color specifying the expected delivery time. This information is shown on product cards and on the product views.
To enable this feature you need to setup the Product devliery time (or terms) under Theme settings→Products.
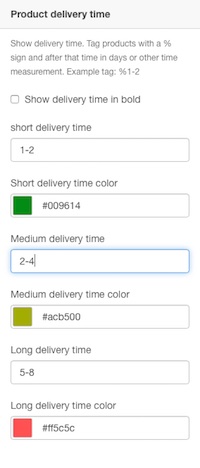
| Your delivery terms tag can be whatever text you like, however in multishop scenarios you need to use a keyword that can be localized. |
After you have configured your tags you set them on your products in Panda Admin→Products.

Product addons
Using product addons is a handy way of associating products with each other. This feature also work with blog posts so that you can connect products to your posts, efficient for content marketing purposes.
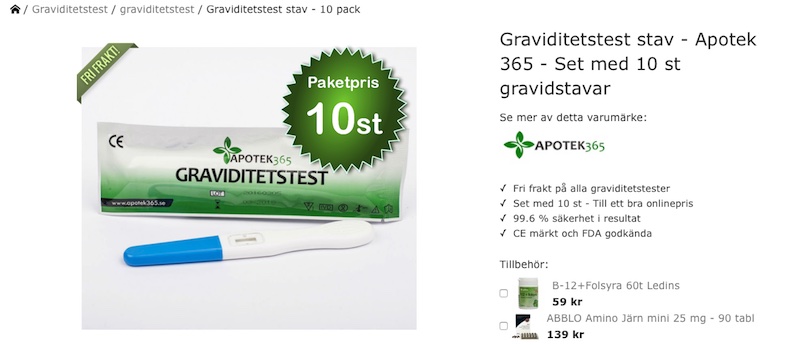
In the example above you can see two addon products on the bottom right. Now if a customer tick the addon products and adds the main product to the cart the addons are included too.
To enable this feature you first need to lookup the addon products handle.
You’ll find the handle almost at the bottom of the product page in Panda Admin→Products.
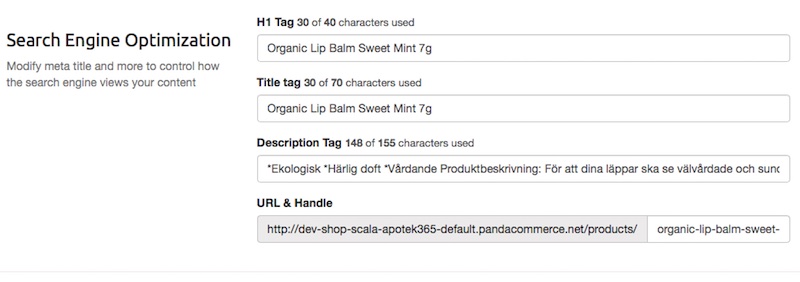
Then copy the handle from the URL & Handle field, you’ll need this later to tag the main product (or blog post).
After that go to the product you want to attach an addon to in Panda Admin→Products.
Finally tag the product with the addon handle starting with a plus +.
Example: +organic-lip-balm-sweet-7g.

| Use one or more addon tags in blog posts to link products on the post. |
Product badges
Product badges allows you to assign attributes (icons) to products such as Organic, Fair Trade.
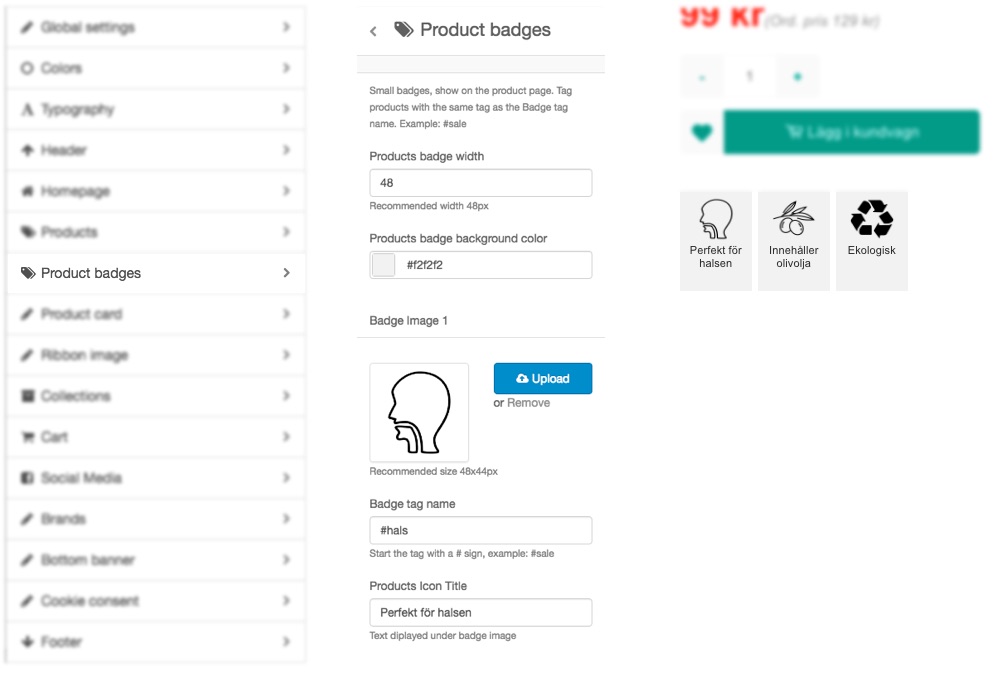
In the figure above, on the left side you see the Theme settings for Product badges. On the Right side you see how the badges can look on a product page in your store.
| You need to upload your own badge images and badges must be configured with a matching tag name and image + text in the Theme settings. |
To add a badge to one or more products
-
Go to Theme Settings.
-
Select Product badges
-
Click the
Add Badge Imagebutton and upload a (small) image file. -
Choose a Badge tag name with the name of the tag to add to products.
-
You may also add an optional description text that is shown under the image.
-
Tag products with the Badge tag name and a glyph will be shown under the "Add to cart" button.
| If you want to add more images, just repeat step 3-5 |
Product ribbons
Product ribbons are used for displaying an overlay on the product picture. It can be used for marking products that are on sale, new or recommended.
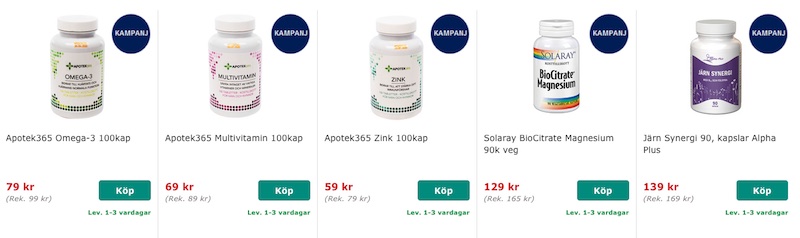
In the example above you can see products marked as campaign products.
To setup product ribbons go to the Theme Settings→Ribbon image topic.
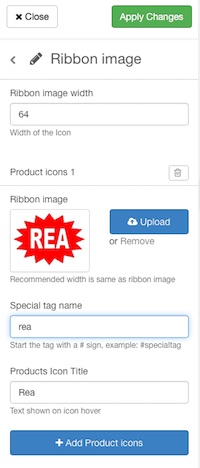
Upload your ribbon images and configure the tag names that match the ribbon image i.e set tag-name campaign for a #campaign product tag.
After you have setup the ribbons you can start tagging products in Panda Admin→products.
Use the Action feature in Panda→Products with Filters to narrow your search results, then you can bulk tag many products at once.
|
Support
To get the latest features and fixes you can sync the Theme files with our latest updates by clicking on the Template Editor link in Panda→Themes and then the Sync button at the top right side. It opens a popup window where you keep all the "Exclude files" checked and import the update by clicking on the Sync button at the bottom right.
| Syncing a theme overwrites any local changes you have made on the theme files. Use the file archive feature on a file to restore your older saves. |
Version
The current version you have installed is specified in the settings.json file. You can see the content of the file using the Template Editor opening the configfolder and clicking on the settings file. In there you can see a version number. Example "version": "0.1.11".
More help ?
For additional support or questions contact our support by email, we usually respond within the same day.